Technical Installation instructions
Application on roofs, vertical walls, ceiling and floorsApplication on roofs, vertical walls, ceiling and floors
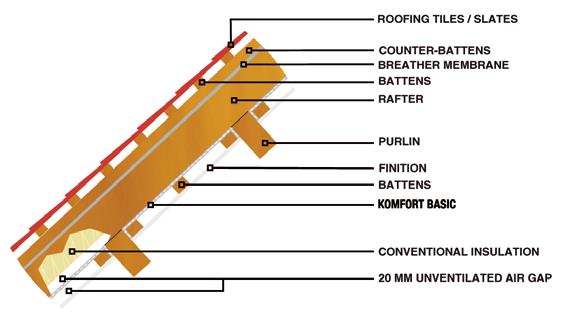
Before installing Komfort WRAP, carefully check that the conventional insulation has been correctly fitted. In particular, check beforehand how the 20 mm air space between the conventional insulation and Komfort WRAP will be formed:
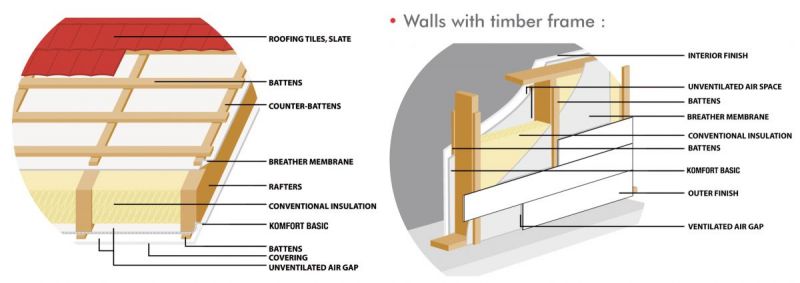
Either the conventional insulation does not fill the whole height of the rafter, and due to its composition,it is not likely to settle (refer to the manufacturer’s information). In this case, Komfort WRAP can be unrolled directly below the rafters, provided that the distance between Komfort WRAP and the conventional insulation is at least 20 mm.
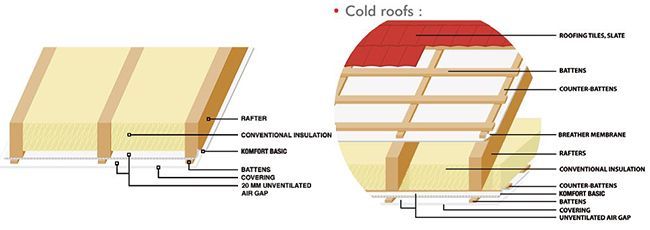
Or the conventional insulation fills the whole height of the rafter, or due to its composition, it is likely to settle (refer to the manufacturer’s information). In this case, before fitting Komfort WRAP, lathing must be carried out, using laths not less than 24 mm thick to create the air space. Lathing should be done perpendicular to the rafters.
The first strip of Komfort WRAP is then unrolled horizontally or vertically, according to the orientation of the frame, correctly stretched and provisionally fixed in place with 14 mm clips. Further strips of Komfort WRAP are then put in place with an overlap of not less than 50 mm, and 75 mm Komfort WRAP adhesive is applied to achieve tightness.
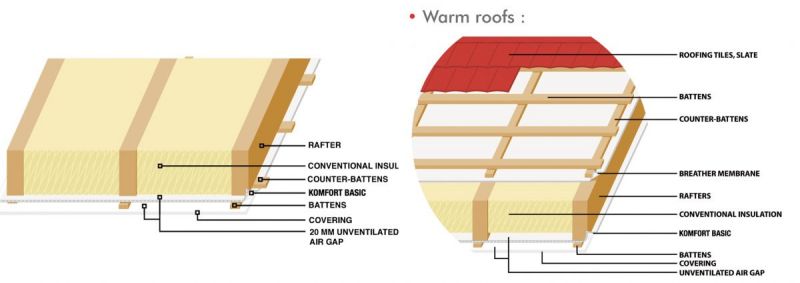
A 50 mm return should be allowed at joints with the ridge purlin, plate, wall, etc. This return should be made tight by applying Komfort WRAP adhesive, if the surface is smooth, dry and clean, or a sealant on rough surfaces.
The laths that will carry the final finish are then fixed on to the frame (wood panelling, plasterboard, etc.). The laths will crush the Komfort WRAP at the purlins or other joints.